

Email Verification in Contact Import
You can now verify email addresses as part of the contact import itself. Select one checkbox on the last step of the import, and every imported email is checked automatically once the import finishes.
This article explains why the option was added, how to turn it on, how to track progress in Bulk Actions, and how to create a Smart List of valid emails for safe sending.
Table of Contents1Why Email Verification Was Added to Import2The Simplified Journey3How to Verify Emails During Contact Import4Understanding Verification Results5Frequently Asked Questions1Why Email Verification Was Added to Import
Bulk email validation has always been available from the contact list, but it was a separate step from the import. To validate newly imported contacts, you had to:
- Complete the import
- Navigate to the contact list
- Manually multi-select the imported records
- Trigger bulk validation separately
These extra steps made it easy to skip validation entirely, which meant campaigns were often sent to lists containing invalid addresses.
What ChangedEmail verification is now built into the import flow. Select it on the final step, and verification runs automatically after the import completes. No extra navigation or multi-selecting needed.
2The Simplified Journey
The whole process now fits into one continuous flow:
1. Import, upload your file and map fields as usual.2. Select verification, tick the email verification checkbox on the final step.3. Track status, follow progress on the Bulk Actions page.4. Review results, see Valid, Invalid and Error counts per contact.5. Create a valid-only list, build a Smart List of valid emails in one click.6. Send safely, use the Smart List in your campaigns.Setup GuideVerify Emails While Importing ContactsFive steps from upload to a clean, campaign-ready list.3How to Verify Emails During Contact Import
Step 1Import your contactsGo to Contacts → Import. Work through the Start, Upload and Map steps as usual: select the objects to import, upload your file, configure settings and map columns to fields.
Step 2Turn on email verification (new)On the final Verify step, under Preferences, find the Add email verification section and tick:
☑ Enable email verification and verify email addresses for this import
Then review your file, tick the consent confirmation at the bottom of the page and click Start import.
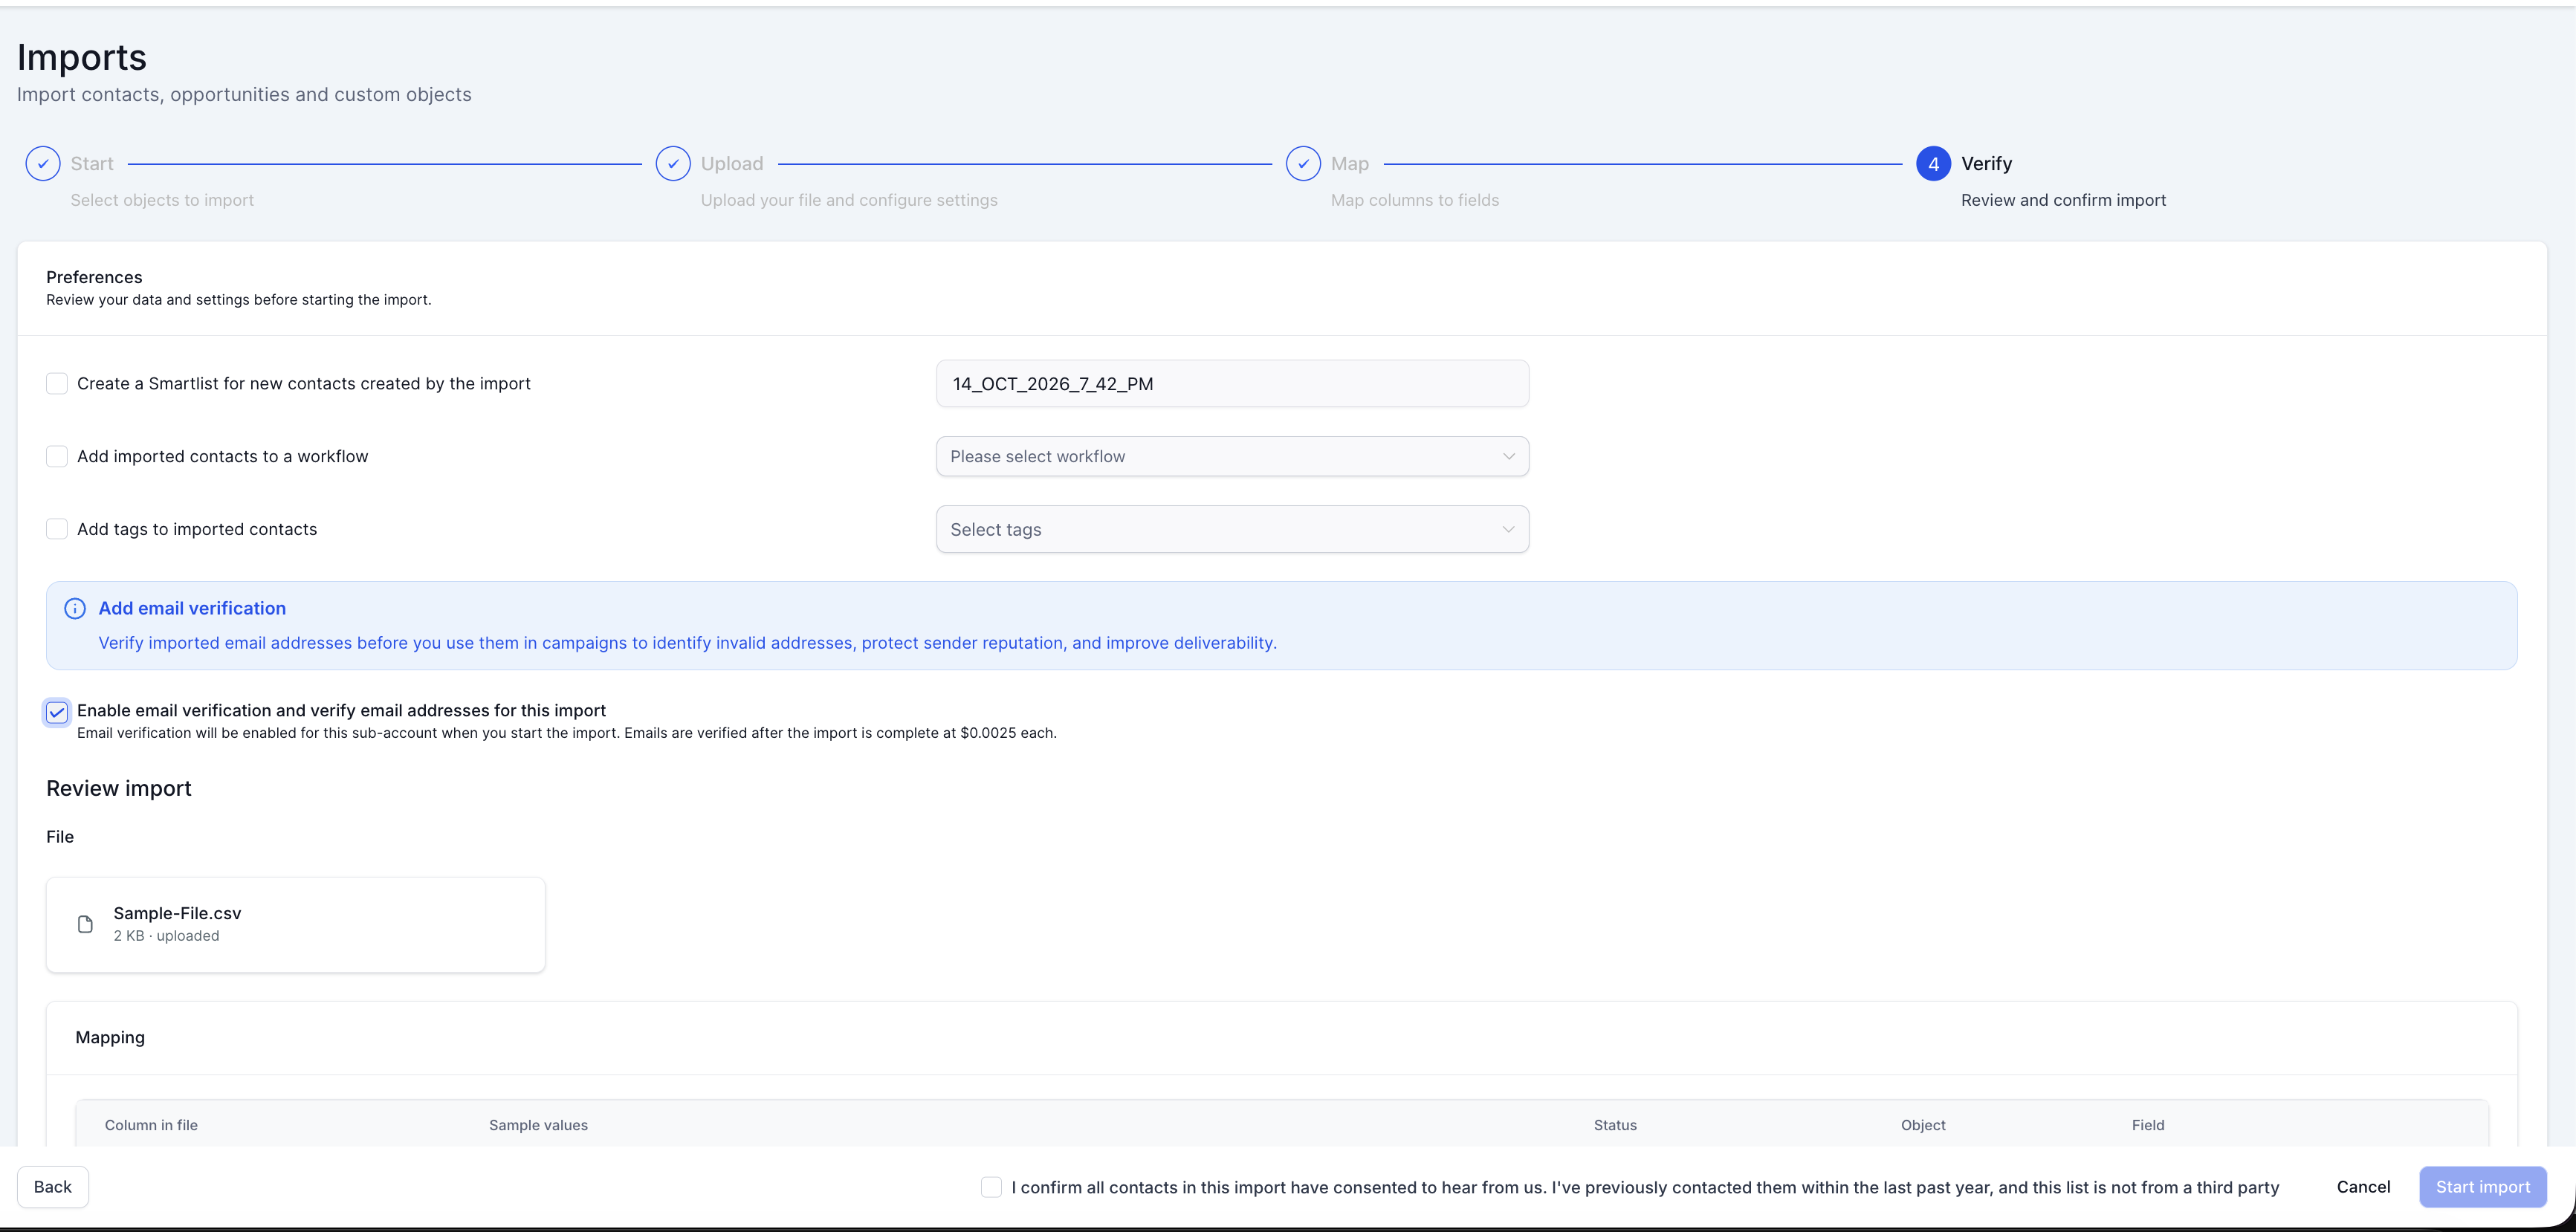 The new email verification option on the Verify step of the import.Note
Selecting this option enables email verification for the sub-account when you start the import. Emails are verified after the import completes and are charged at $0.0025 per email.
Step 3Post-import confirmationOnce you start the import, a confirmation pop-up appears letting you know your import (and email verification, if selected) is running in the background. You can keep working while the records are processed. Click View bulk actions to track progress, or Go to Contacts now. You'll be redirected automatically after a few seconds.
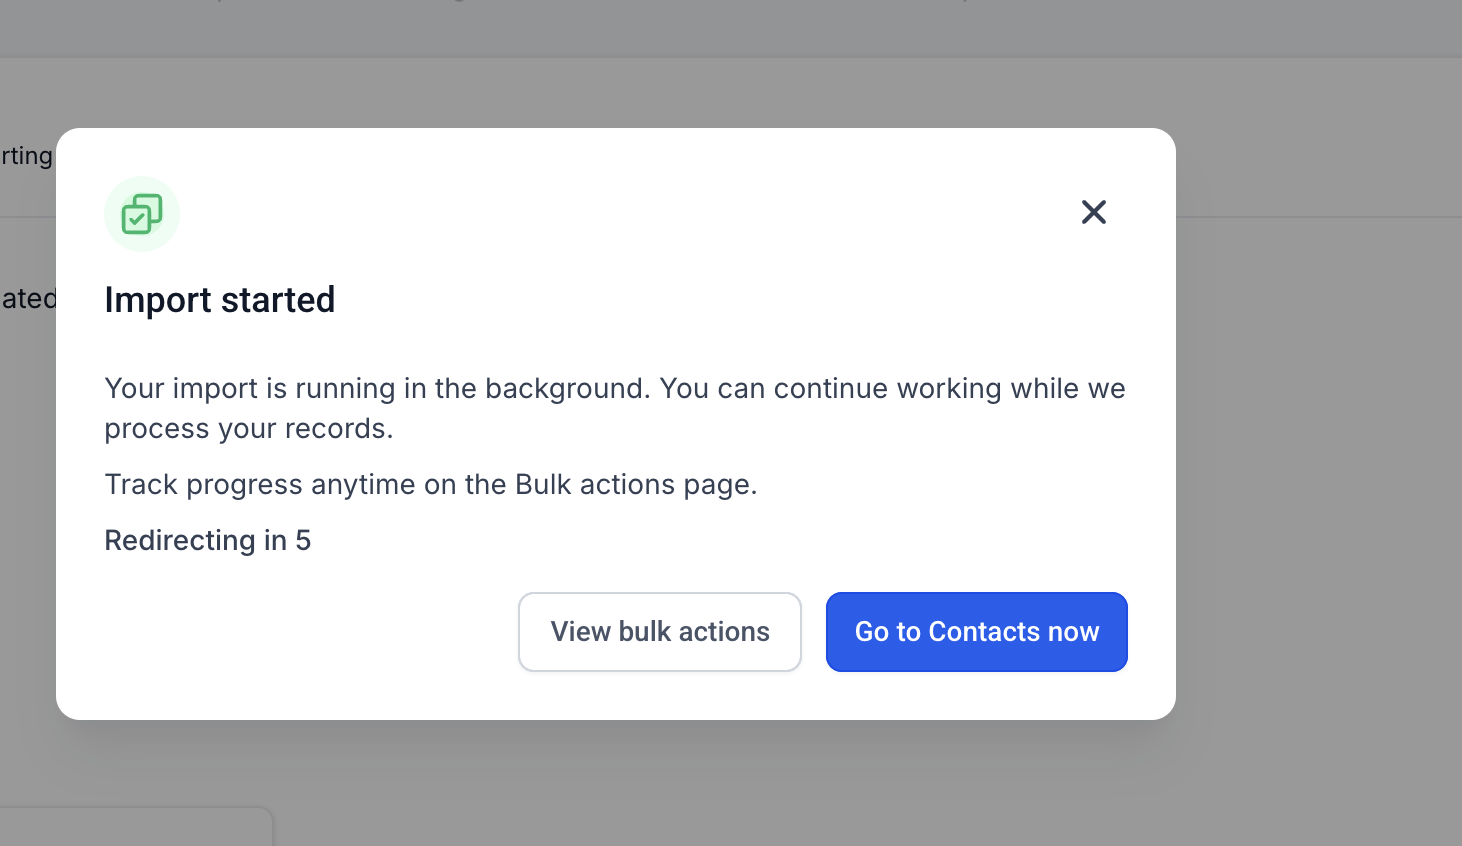 The confirmation pop-up shown after starting the import.Step 4Track progress in Bulk Actions
A bulk action is created automatically, named Contact_import_{{DATE-TIME}}. Its status shows as Processing while the import and verification run, then changes to Completed.
Once completed, the bulk action displays the total contacts processed along with the number of Valid, Invalid and Error results.
Step 5Review results and take actionClick the stats on the bulk action to open Bulk import stats. Each imported line shows its identifier, object, import type (for example Created) and a new Email verification column with the result. Use the All, Success, Error and Warning tabs to filter, or click Download to export the results.
Click Create Smart List of Valid Emails to instantly build a list containing only valid addresses.
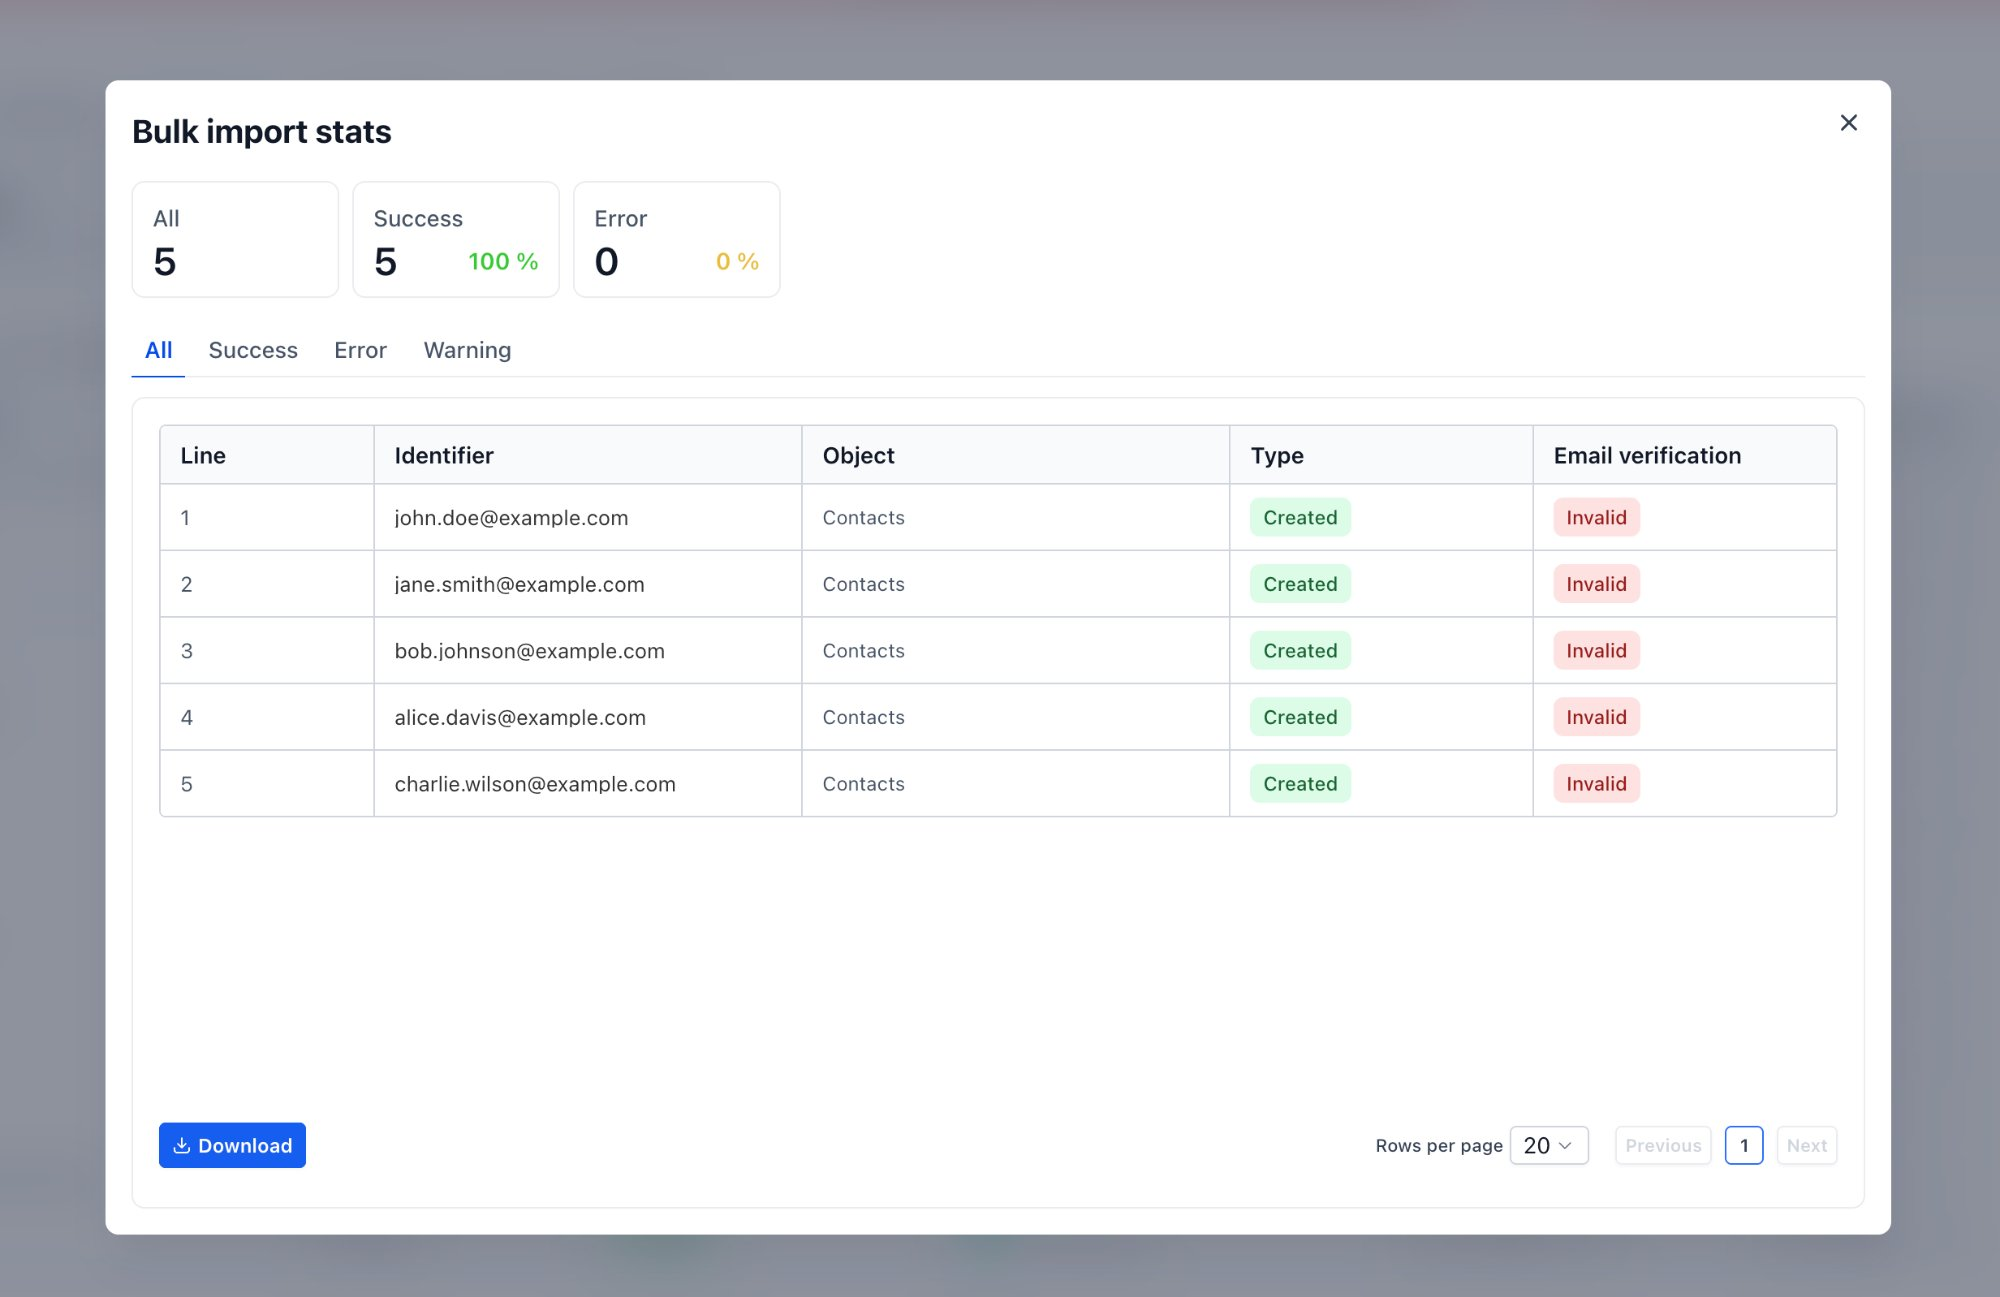 Bulk import stats showing the email verification result for each contact.You're All Set
Your new Smart List is ready to use right away. Select it as the audience for your next campaign to send only to verified, valid email addresses.
4Understanding Verification Results
Import status and email verification status are tracked separately. A contact can be imported successfully (Created) and still have an Invalid email.
| Result | What it means | Recommended action |
|---|---|---|
| Valid | The email address passed verification and can receive mail. | Include in campaigns via the valid-emails Smart List. |
| Invalid | The address is unlikely to receive mail (e.g. non-existent mailbox or domain). | Exclude from sends to protect sender reputation; correct the address if possible. |
| Error | Verification could not be completed for this record. | Review the record and re-run bulk validation from the contact list if needed. |
Sending to invalid addresses increases bounce rates and can damage your sender reputation and deliverability. Always send campaigns to the valid-only Smart List rather than the full import.
5Frequently Asked Questions
Q: How much does email verification during import cost?Each email is verified at $0.0025. Verification only runs when you tick the option on the Verify step, so imports without it are not charged for verification.Q: Will invalid emails stop contacts from being imported?No. Verification runs after the import completes, so contacts are still created or updated. The verification result is shown separately in the Email verification column so you can decide who to send to.Q: Where can I see the progress of verification?Go to the Bulk Actions page and look for Contact_import_{{DATE-TIME}}. The status shows Processing until both the import and verification are finished, then Completed.Q: Does enabling this option change anything for my sub-account?Yes. Email verification is enabled for the sub-account when you start an import with this option selected.Q: Can I rename the Smart List of valid emails?Yes. The default name is Imported_valid_emails_{{DATE}}, but you can change it to anything that suits your campaign.Q: I forgot to tick the verification option. Can I still verify the imported contacts?Yes. You can still use bulk email validation from the contact list: filter or select the imported contacts and trigger validation as a bulk action.Q: Can I download the verification results?Yes. Open Bulk import stats from the bulk action and click Download to export each line with its import type and email verification result.More in Open Doors Email
- Dedicated Email Sending Domains Overview & Setup
- How to Set Up Unsubscribe Links
- Two Way Email Sync for Outlook
- How to use the Email Risk Assessment Tool
- How to enable Open Doors Email Validation
- What is a dedicated IP in LC email?
- Reverse DNS white labeling - Dedicated IP
- Achieving Compliance: Meeting Google and Yahoo's Email Sender Requirements in 2024
- Email Authentication - DMARC
- Understanding Conversion Metrics for Tracking Email Campaigns
- Where Can I Find My SMTP Credentials?
- How to Add a Domain and Verify DNS Record