

Invoices & Estimates
How to view all "Chart of Accounts" within the Xero Integration?
1 min read Updated 28 August 2025
If you are unable to view your Chart of Accounts in your CRM after connecting with Xero, follow the steps below to enable it.
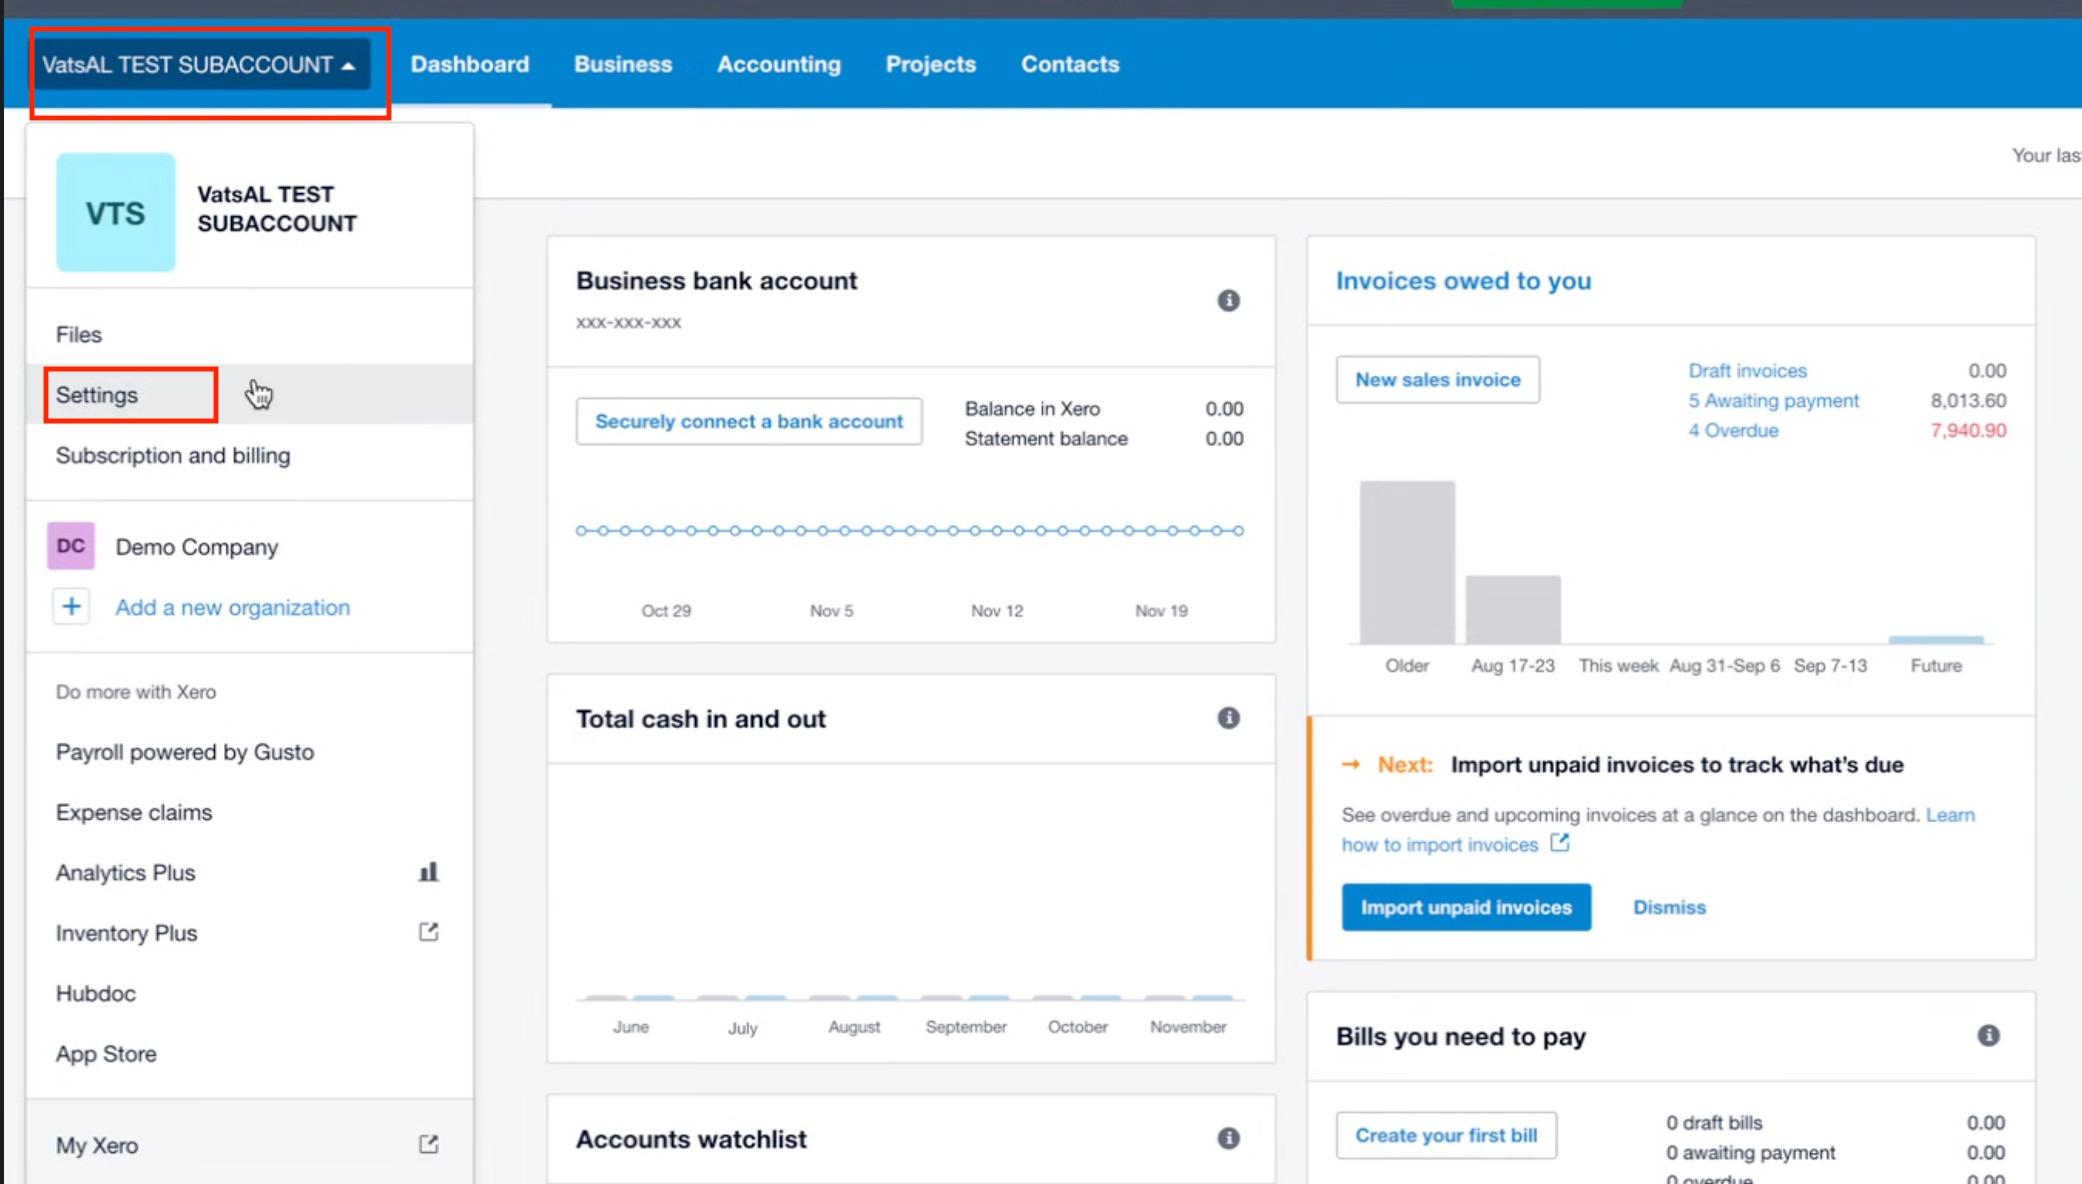
Step 1: Go to Settings in Xero
From your Xero dashboard, select your organization.
Click Settings from the dropdown menu.
Step 2: Open Advanced Settings
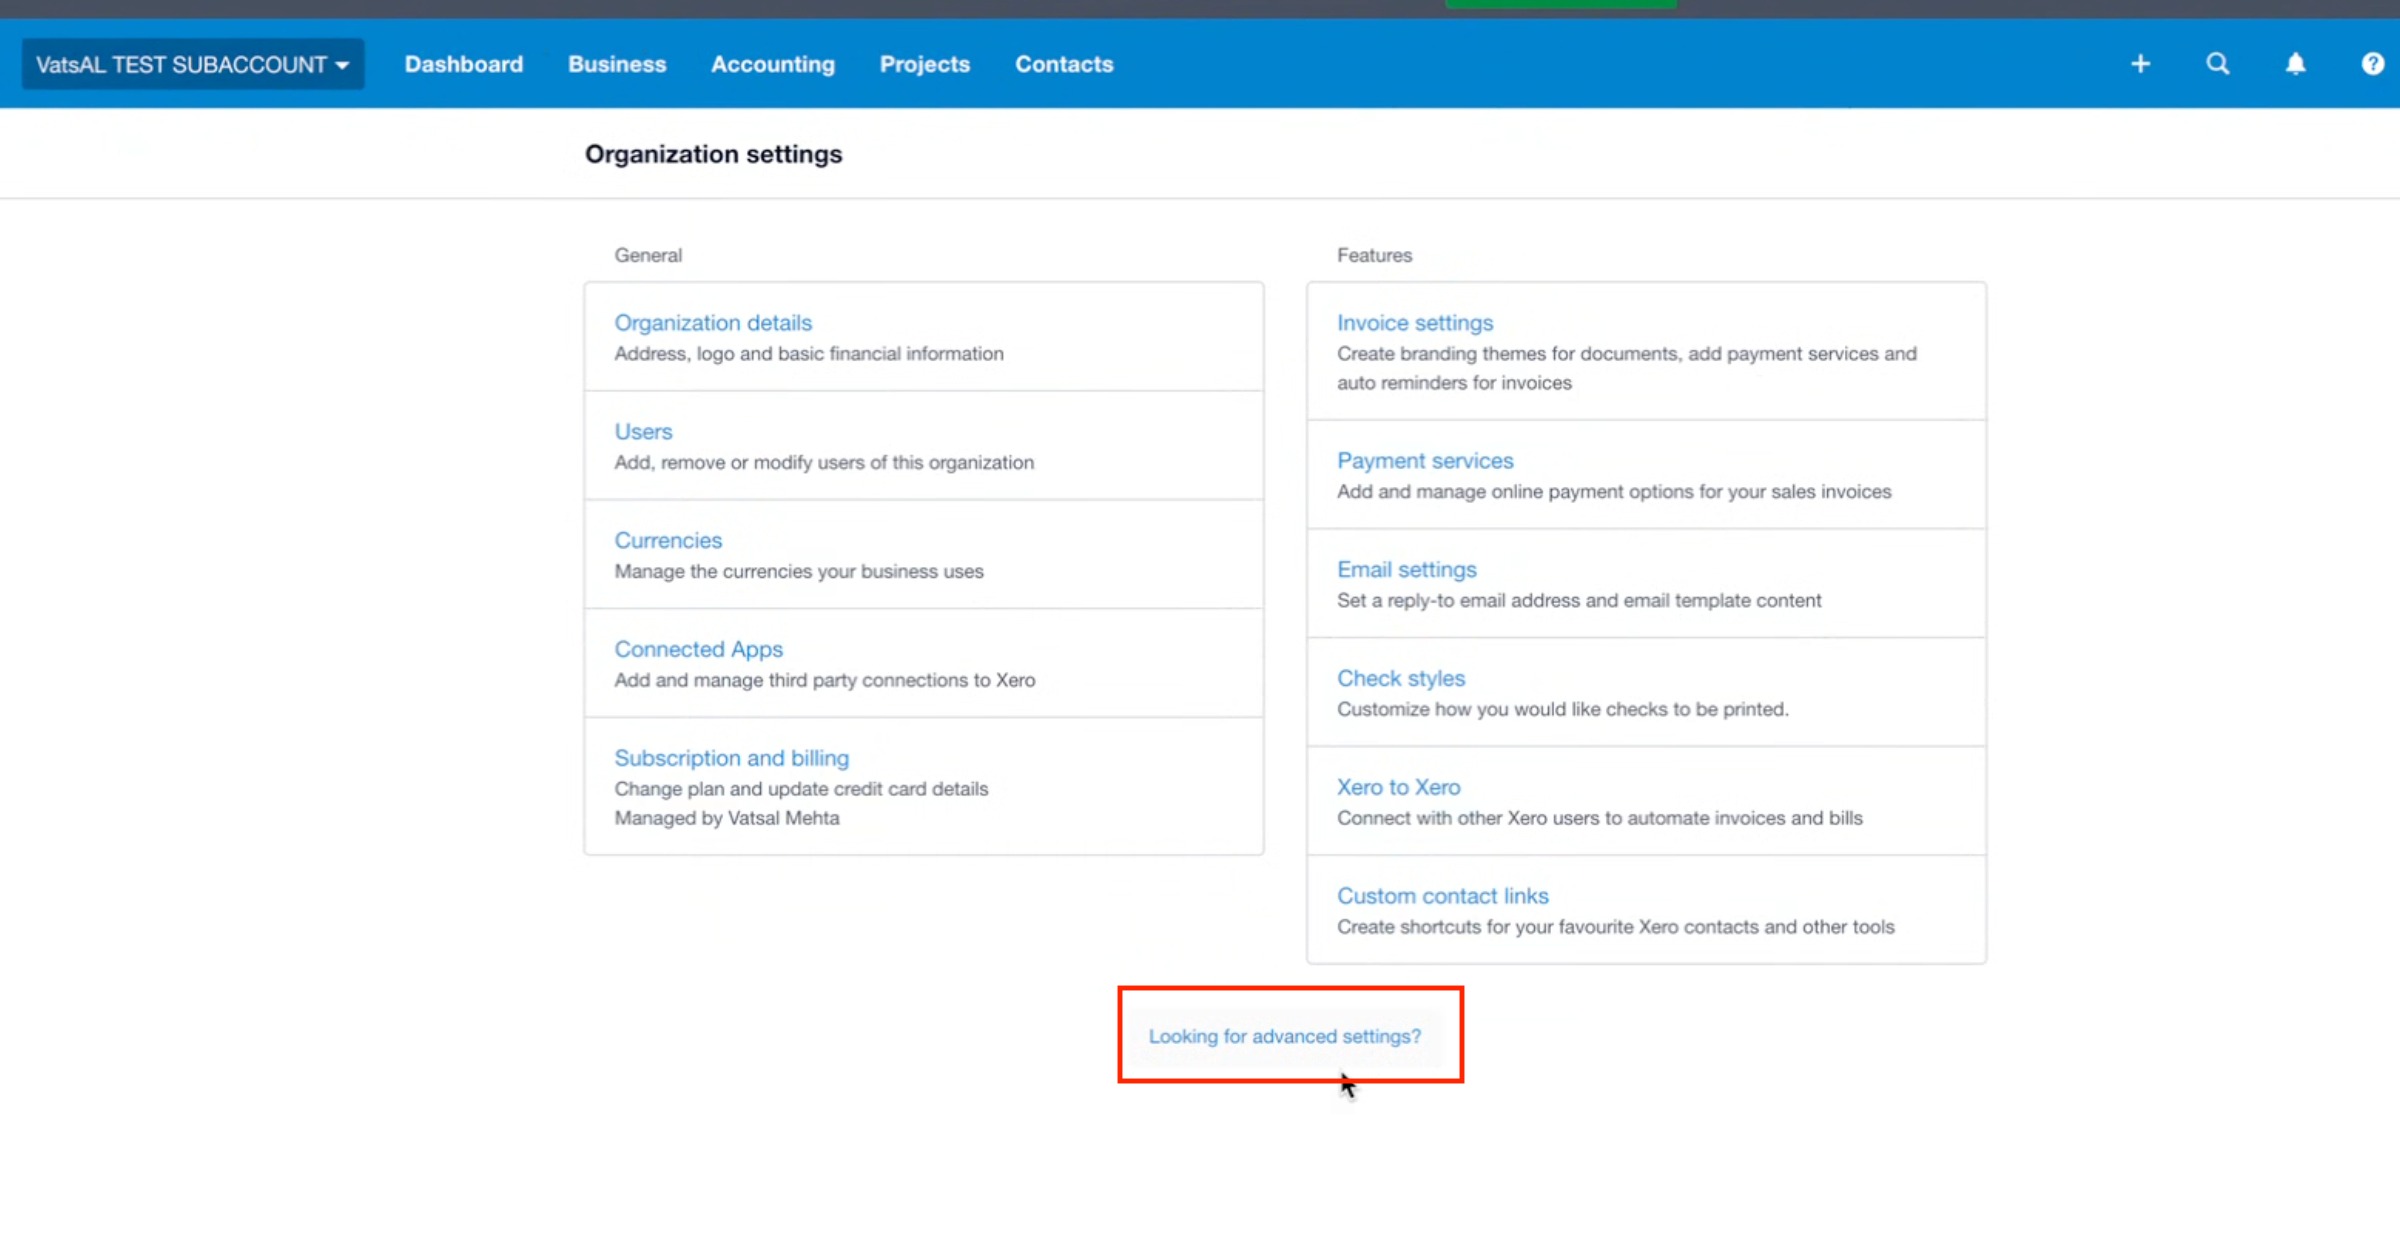
In Organization settings, scroll down and click Looking for advanced settings?
Step 3: Access Chart of Accounts
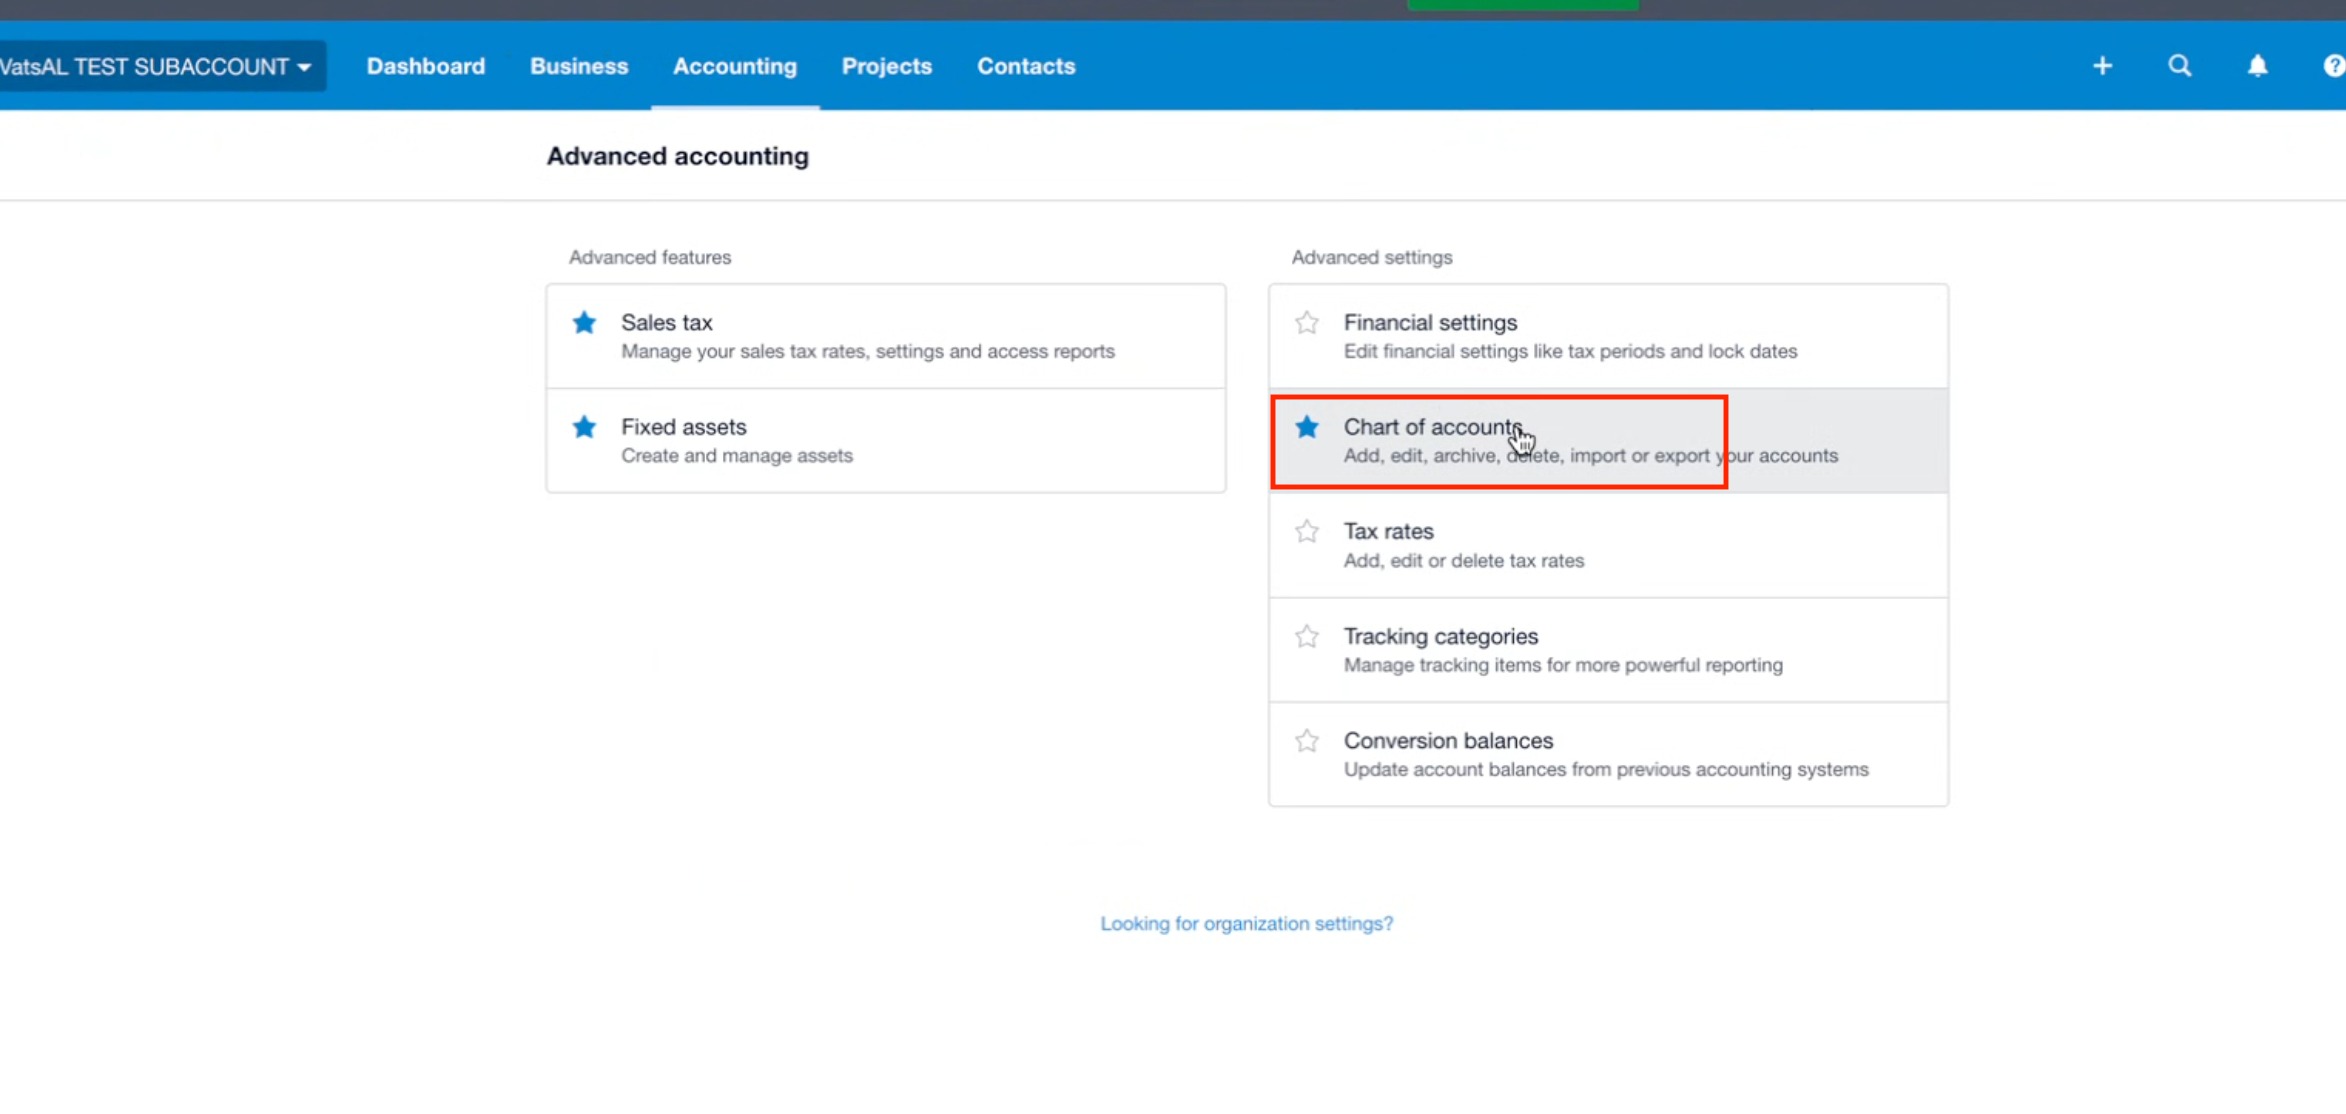
Under Advanced Accounting, click Chart of accounts.
Step 4: Select the Relevant Account
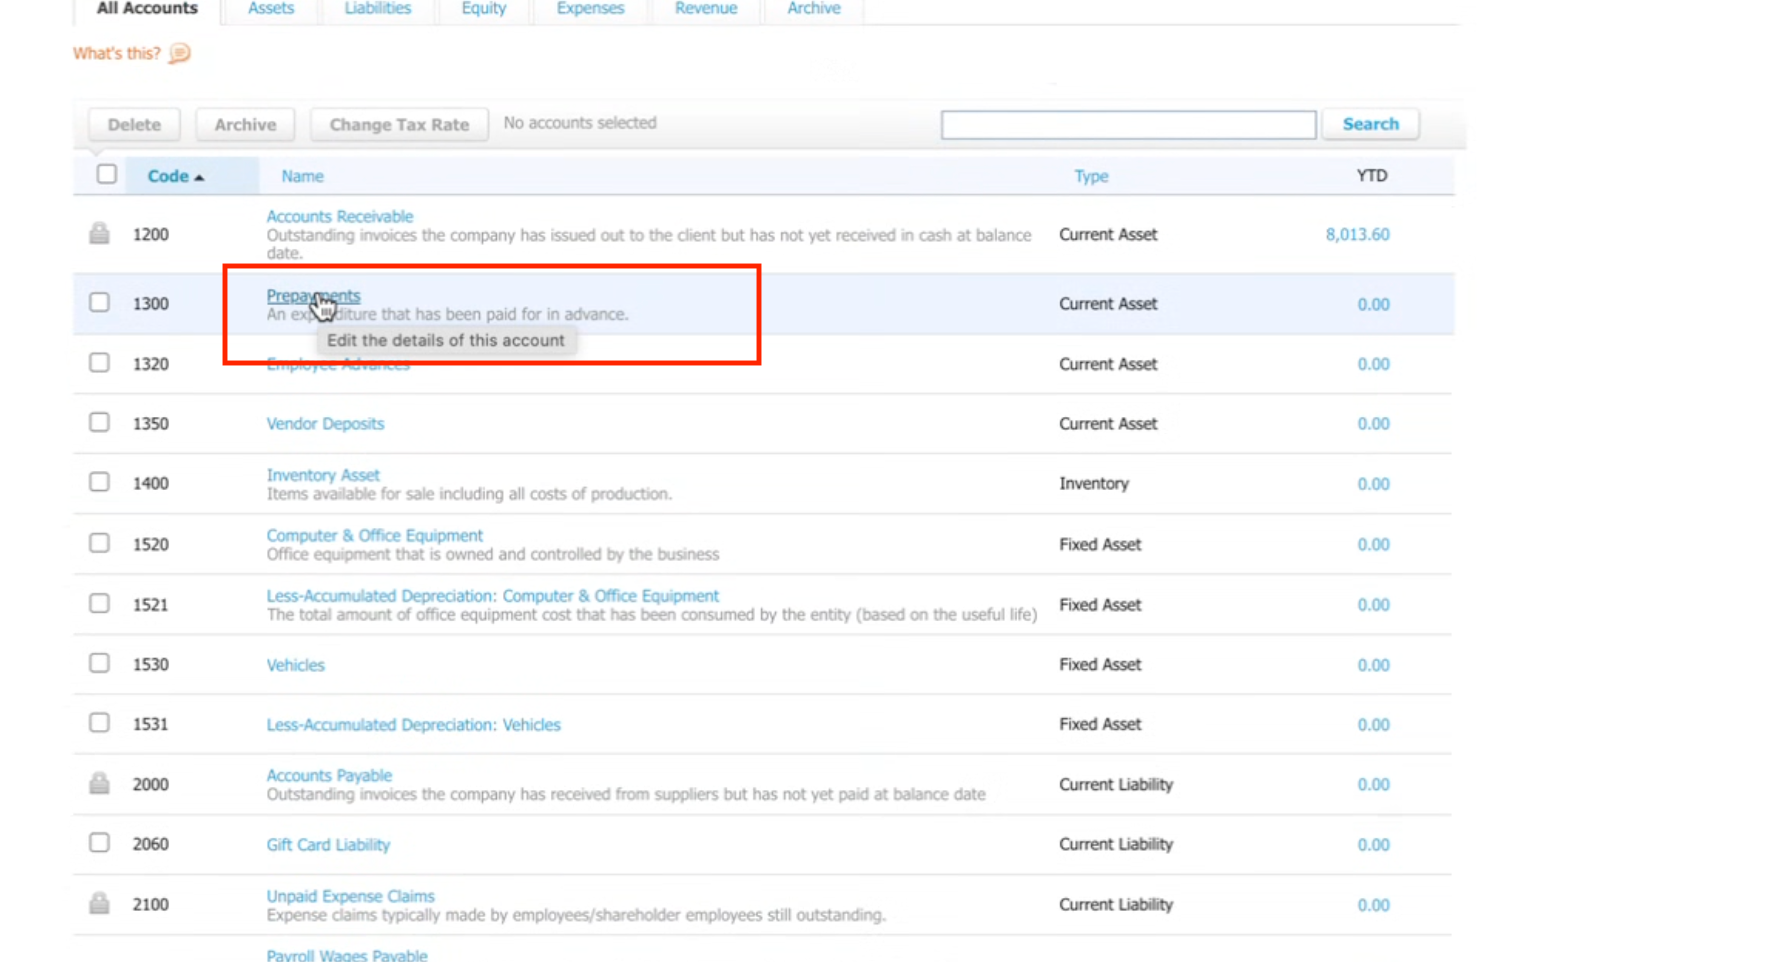
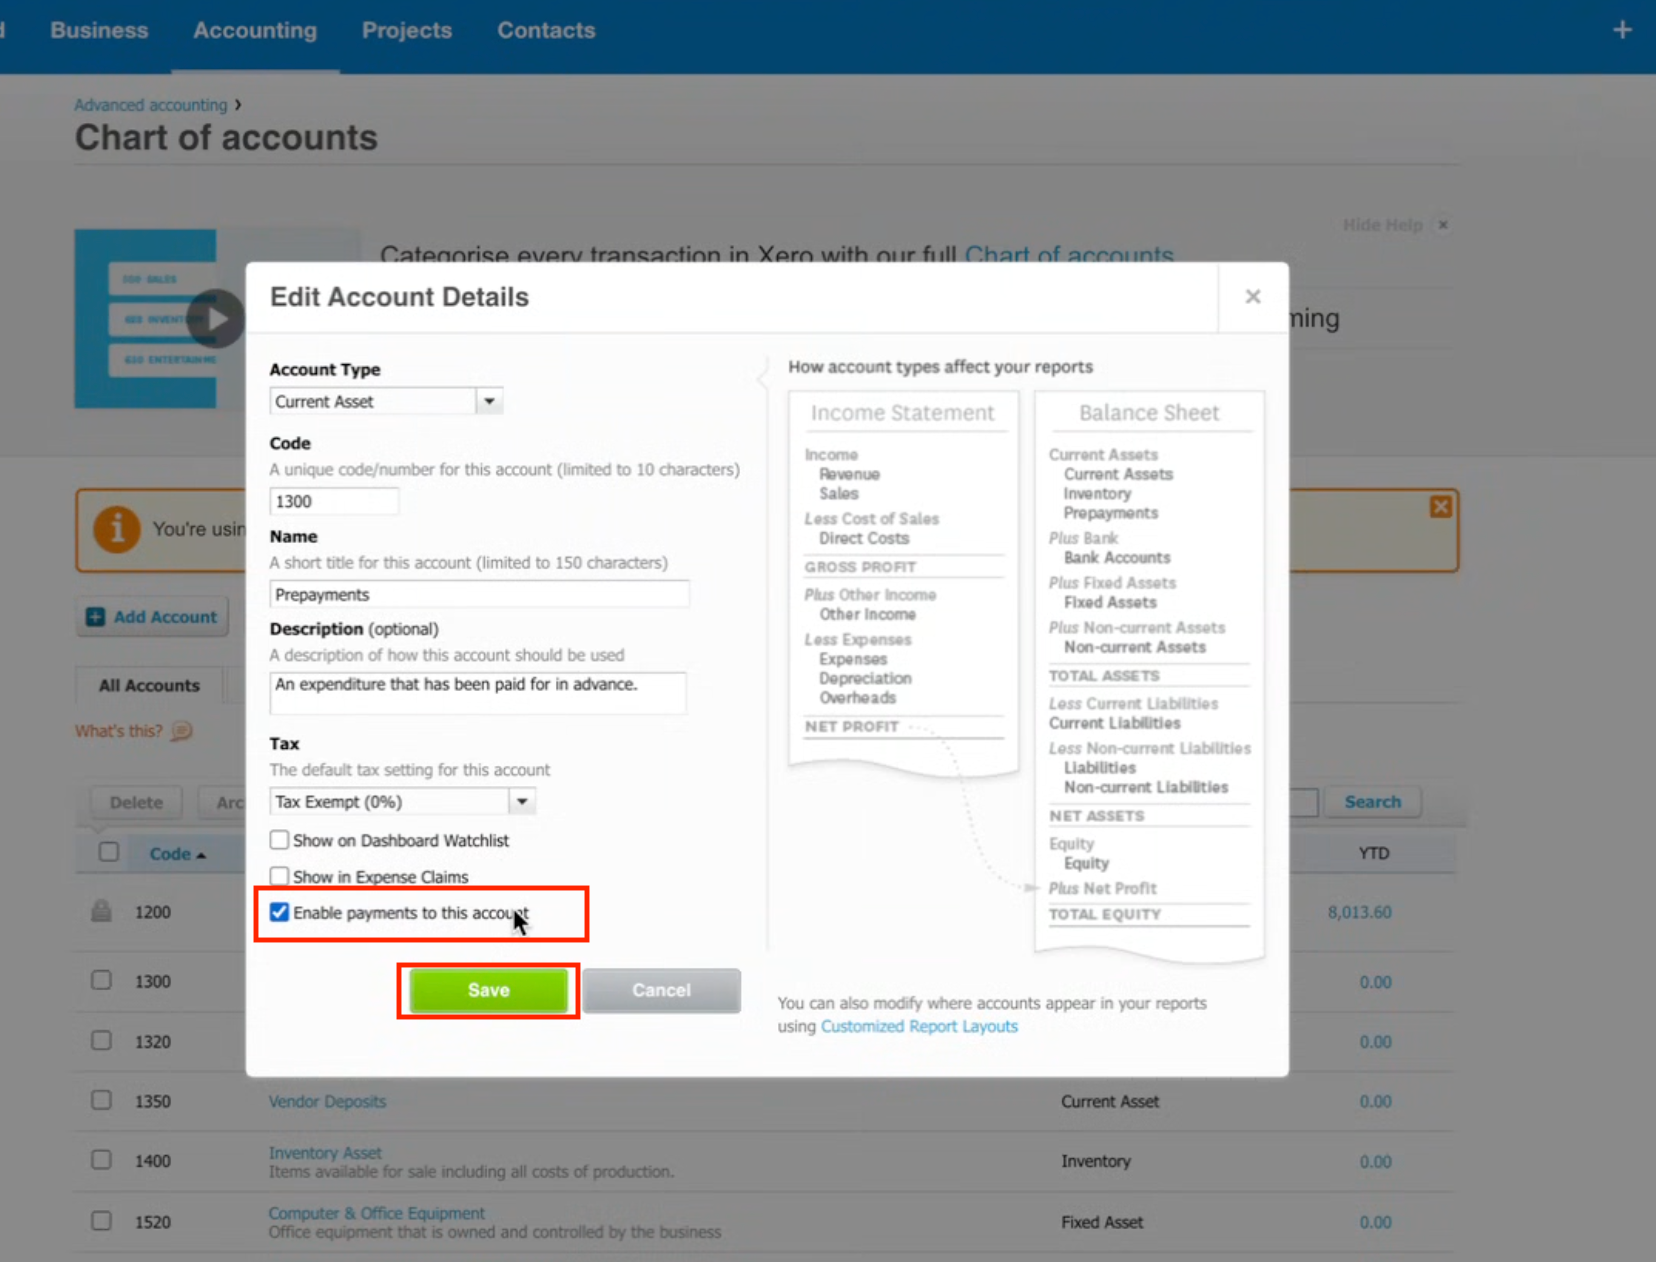
From the list of accounts, choose the account you want to connect (e.g., Prepayments).
Click to Edit the details of this account.
Step 5: Enable Payments for the Account
In the edit popup:
Tick ✅ Enable payments to this account.
Click Save.
Step 6: Connect in CRM
Go back to your CRM Xero integration.
Under Connected Account, select the account you just enabled (e.g., Prepayments).
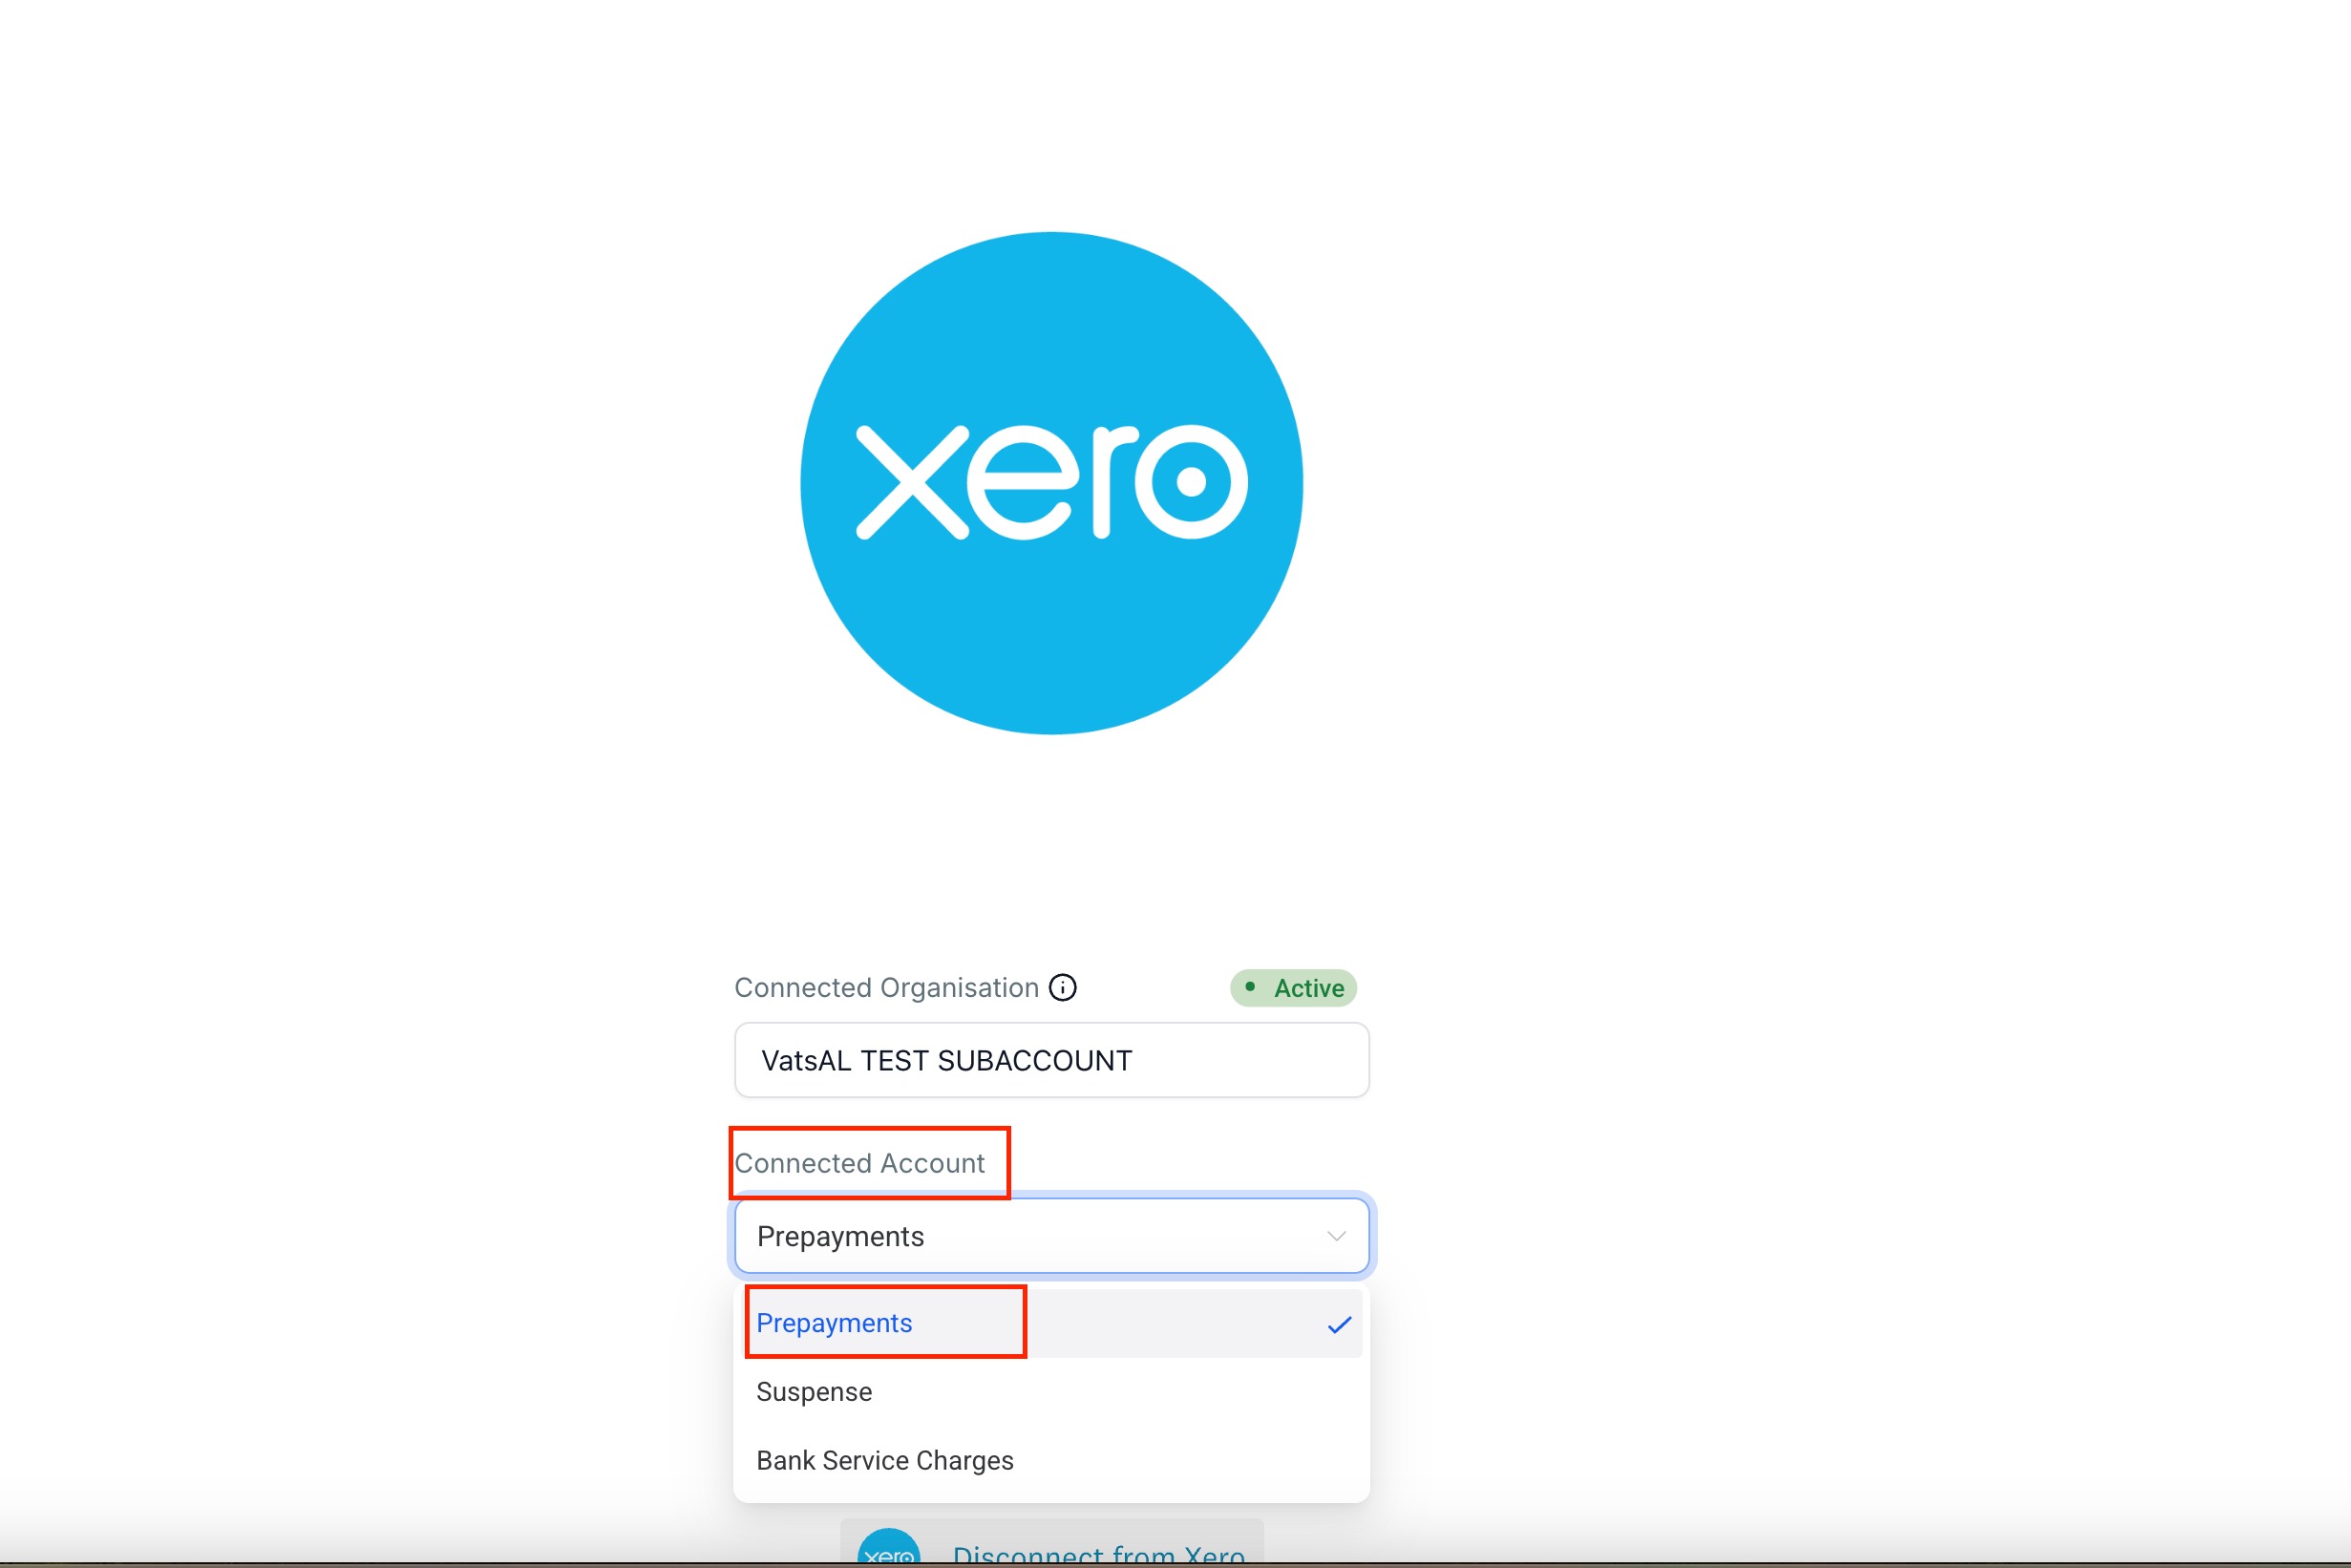
✅ Once done, your Chart of Accounts will now be visible and ready to use in your CRM.
More in Invoices & Estimates
- Create and Send Invoices Faster with the New Invoice Editor
- PDF Generation for Invoices and Receipts
- Managing Document Attachments for Estimates and Invoices
- Set Up Automatic Recurring Invoices Step-by-Step
- Flexible Invoice Editing for Partially Paid Invoices
- Wallet Pricing Page
- Invoices - New revamped UI
- Using Apple Pay and Google Pay in Order Forms